Autonomous Pen Testing with PentAGI Against OWASP Juice Shop
I pointed an AI-powered pentesting agent at a deliberately vulnerable web app, sat back, and watched it work. Here’s what happened — from setup to findings — in under 40 minutes and for $1.39.
Pre-Requisites
Before you begin, make sure you have the following ready on your local machine:
- Docker Desktop installed and running locally.
- Docker images pulled: OWASP Juice Shop and PentAGI.
- PentAGI installed per the official getting started guide.
- Valid LLM API keys (OpenAI, Anthropic, etc.) configured in PentAGI’s
.envfile. - General pen-testing knowledge (optional). Following along with PentAGI’s output will teach you plenty, but familiarity with common techniques helps you evaluate what the tool is doing.
OWASP Juice Shop is an intentionally vulnerable web application designed for security training. PentAGI is an AI-powered autonomous penetration testing tool that runs inside Docker and integrates 20+ security tools — nmap, Metasploit, sqlmap, OWASP ZAP, and more — orchestrated by LLM-driven agents that plan and execute tests without manual intervention.
Setting Up the Environment
I started by pulling both images to my local Docker instance: OWASP Juice Shop and PentAGI. Once the containers were running, I had both targets and tools ready to go.
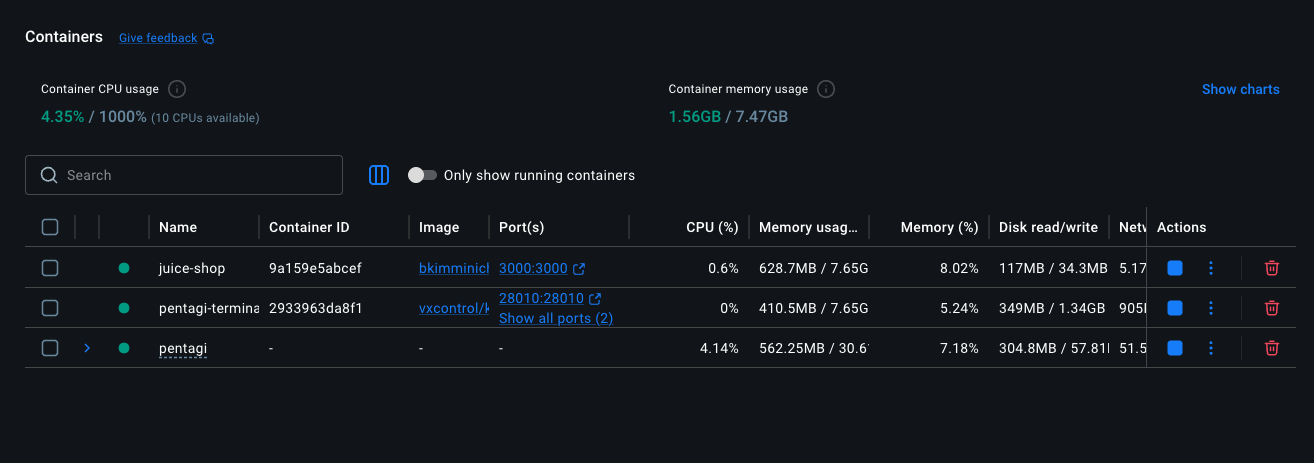 Docker Desktop — Juice Shop, PentAGI, and pentagi-terminal containers running side-by-side.
| Networking note: | Since both Juice Shop and PentAGI run as separate Docker containers, PentAGI’s sandboxed execution containers can’t reach Juice Shop via localhost:3000. On macOS or Windows, the simplest workaround is to use http://host.docker.internal:3000 as the target URL. On Linux, you’d use the Docker bridge network IP instead. |
| Secure & isolated by design: | All PentAGI operations are performed inside a sandboxed Docker environment, so your host machine and network stay protected during testing. And as you can see, this is a very simple setup — just a few containers and you’re ready to go. No complex infrastructure required. |
The PentAGI Interface
After installing PentAGI and navigating to the web interface, the first thing I noticed was how clean and straightforward the layout is. On the left sidebar you have Settings at the bottom and your recent “Flows” at the top. The main panel shows your Flows with key metadata: ID, Title, Status, Provider, Terminals, Created, and Updated timestamps.
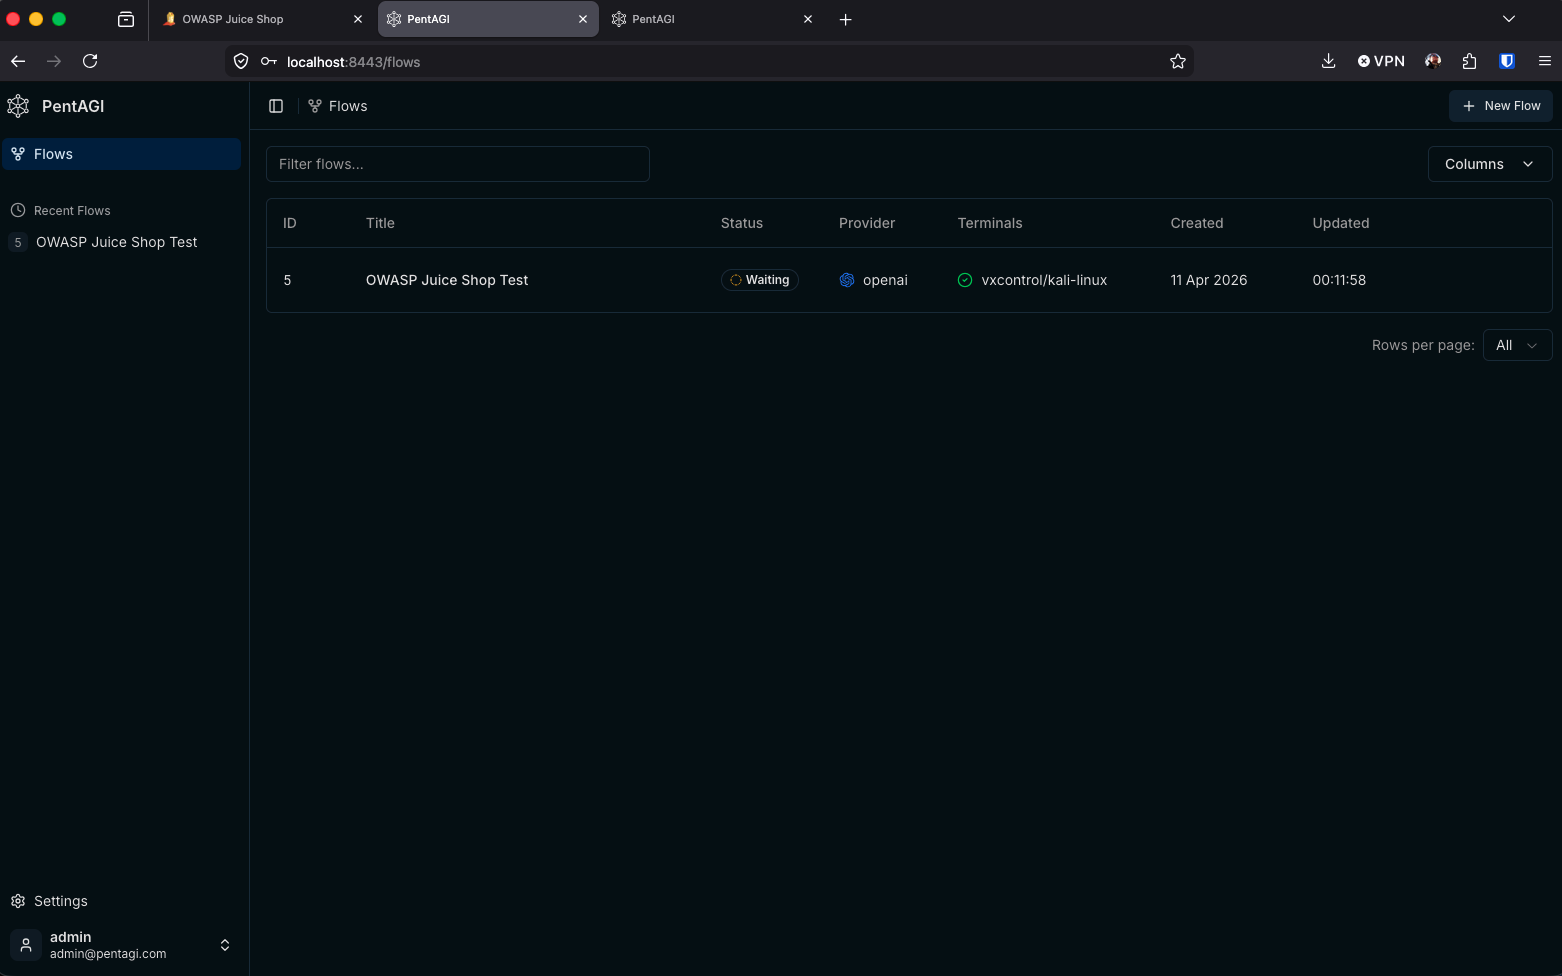 PentAGI Flows dashboard — the single “OWASP Juice Shop Test” flow in a Waiting state.
For this walkthrough, you’ll only see one Flow: OWASP Juice Shop Test.
| Worth noting: | I did not set up any observability stack for this test — PentAGI works out of the box without one. |
Creating a New Flow
To kick off a test, click ”+ New Flow” in the upper-right corner. You’re presented with a simple modal: choose between “Automation” and “Assistant” mode, then describe what you want to test and where.
PentAGI offers specialized AI agents for research, development, and infrastructure tasks, which can extend its capabilities well beyond basic scanning for deeper analysis or custom tooling during an engagement.
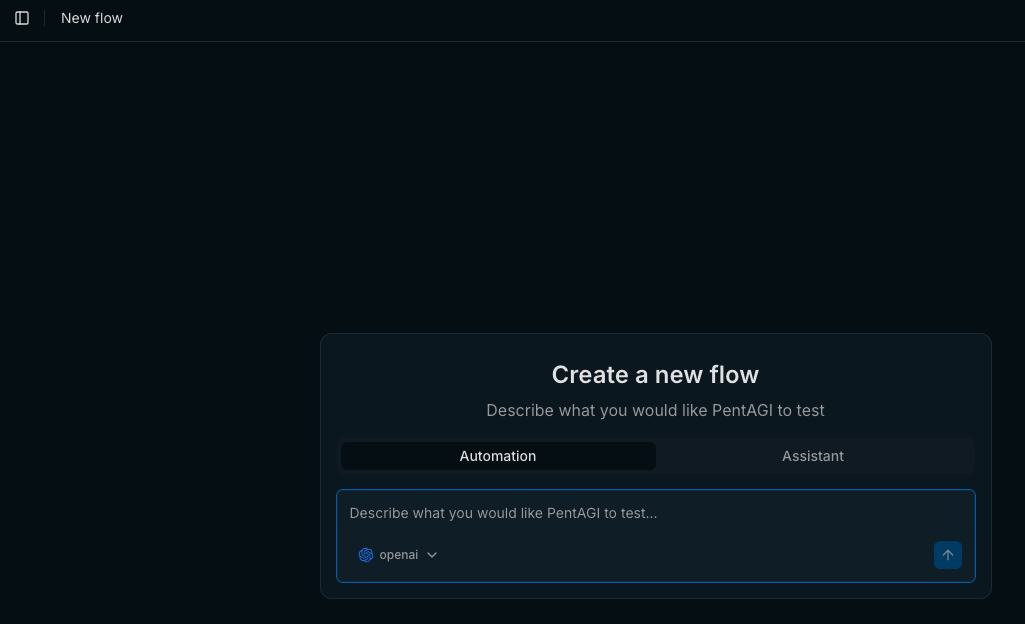 Create a new flow — select “Automation” and describe your target and testing goals.
The key here is to be as descriptive as possible. Your prompt directly determines how the PentAGI agents plan their work and how many tasks get created. You could narrow the scope to specific vulnerability classes (e.g., “test only for SQL injection and XSS”) or leave it broad to see what the tool discovers on its own.
| Tip: | Make sure your PentAGI .env file has valid LLM API keys configured (OpenAI, Anthropic, etc.) since the AI agents depend on them. If the keys are missing or invalid, PentAGI will error out. |
My prompt was intentionally broad:
Test the OWASP Juice Shop, a vulnerable web application at the following target location: http://host.docker.internal:3000
I could have been more specific — perhaps asking it to focus on injection flaws or authentication bypasses. But in this case, I wanted to see the full breadth of what PentAGI could discover autonomously.
Watching PentAGI Work
Once submitted, PentAGI decomposed my broad prompt into a structured set of tasks and began executing them sequentially. The Automation tab shows a real-time feed of what the agents are doing — running scripts, parsing scan output, generating analysis files — while the Tasks panel on the right provides a high-level checklist of every task in the pipeline.
PentAGI mid-run — video demonstration.
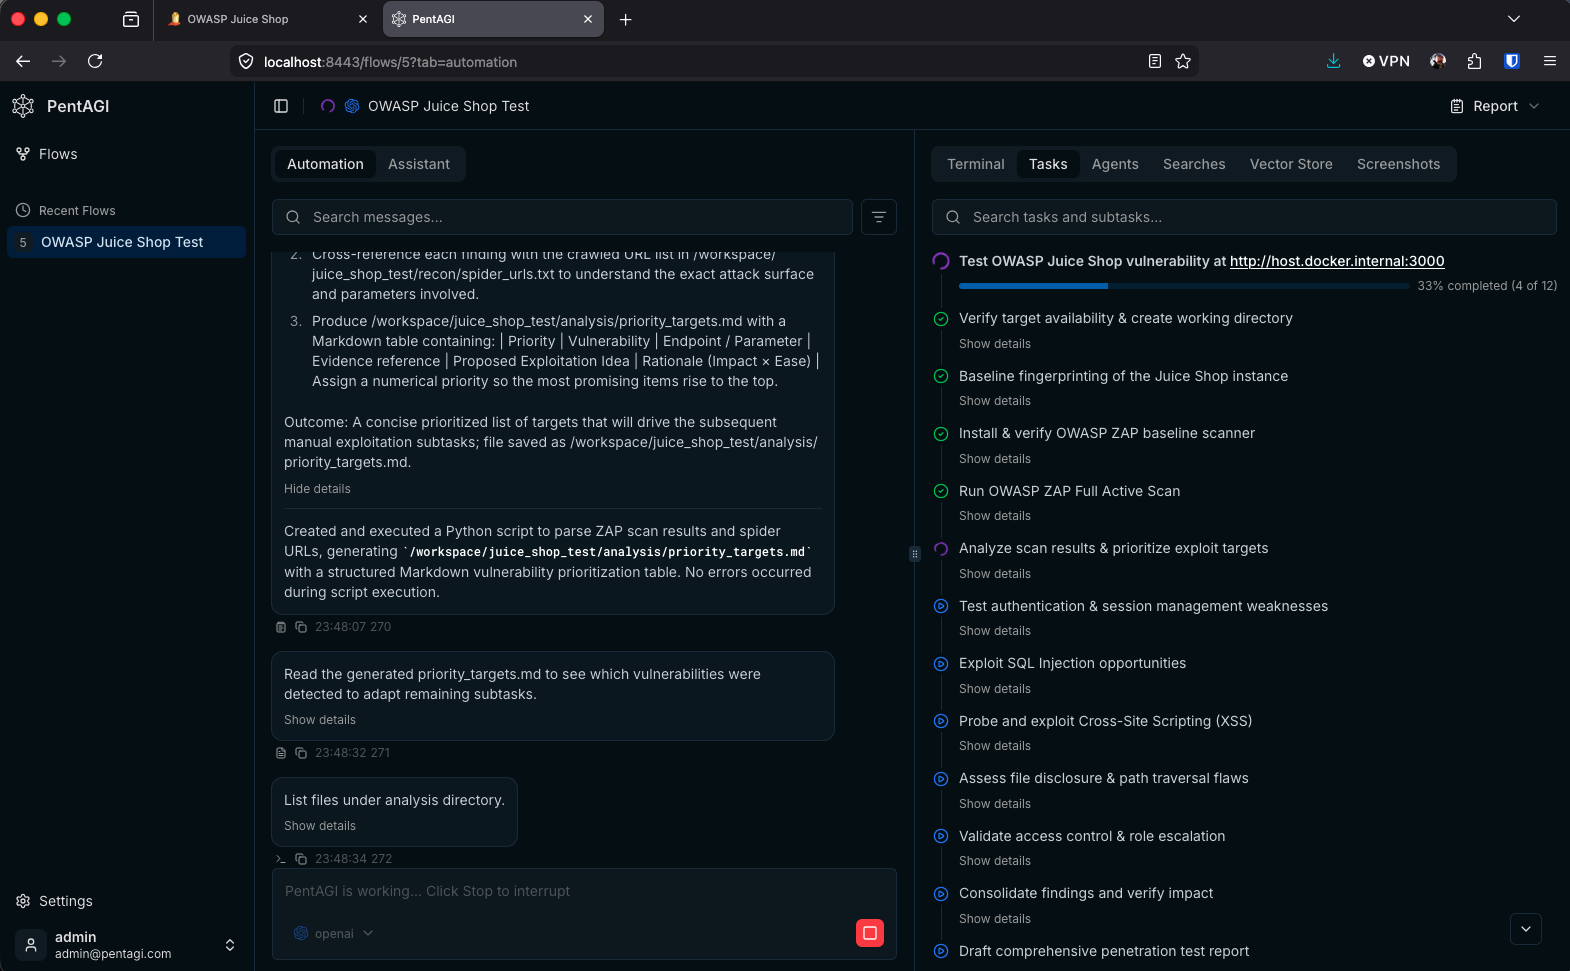
PentAGI mid-run — 33% complete with tasks ranging from fingerprinting to SQL injection exploitation.
Looking at the task panel, you can see the methodical approach PentAGI took. It started with reconnaissance (verifying target availability, fingerprinting the application, running OWASP ZAP scans), moved into analysis (prioritizing exploit targets), and then executed targeted attacks across multiple vulnerability categories: SQL injection, XSS, path traversal, access control, and authentication weaknesses.
| Metric | Value |
|---|---|
| Tasks Created | 15 |
| Total Runtime | ~38 minutes |
| OpenAI API Cost | $1.39 |
Here’s the full task breakdown that PentAGI generated from my single-sentence prompt:
- ✅ Verify target availability & create working directory
- ✅ Baseline fingerprinting of the Juice Shop instance
- ✅ Install & verify OWASP ZAP baseline scanner
- ✅ Run OWASP ZAP Full Active Scan
- ✅ Analyze scan results & prioritize exploit targets
- 🔄 Test authentication & session management weaknesses
- 🔄 Exploit SQL Injection opportunities
- 🔄 Probe and exploit Cross-Site Scripting (XSS)
- 🔄 Assess file disclosure & path traversal flaws
- 🔄 Validate access control & role escalation
- ⏳ Consolidate findings and verify impact
- ⏳ Draft comprehensive penetration test report
What stands out is the logical progression — it mirrors how an experienced penetration tester would approach an engagement: recon first, then scan, analyze, exploit, and report. PentAGI even generated intermediate artifacts like priority_targets.md, a structured Markdown table that ranked vulnerabilities by impact and exploitability to guide its own subsequent tasks.
The Final Report
Once PentAGI completed all tasks, it produced a full client-ready penetration test report (Juice_Shop_Pentest_Report.md) along with supporting artifacts. Here’s a summary of what it delivered.
Findings at a Glance
PentAGI identified 11 distinct vulnerabilities across three risk levels:
| Risk Level | Count |
|---|---|
| High | 3 |
| Medium | 4 |
| Low | 4 |
Verified Exploits with Proof-of-Concept
PentAGI didn’t just flag potential issues — it autonomously crafted curl PoC requests and captured full request/response pairs as evidence for the three highest-priority unauthenticated vulnerabilities:
- Reflected XSS on
/#/search?term— Injected a<script>tag via the search parameter to demonstrate arbitrary JavaScript execution. - Backup File Disclosure at
/ftp/backup.zip— Downloaded a backup archive containing source code and configuration data with a simple GET request. - CORS Misconfiguration on
/api/Products— Sent a request with a spoofedOrigin: https://evil.comheader and confirmed the server reflected it back, enabling cross-origin data exfiltration.
Each of these was marked VERIFIED in the priority targets table, with corresponding evidence files (*_request.txt and *_response.txt) saved under the evidence directory.
Reconnaissance Summary
During the recon phase, PentAGI fingerprinted the Juice Shop stack as Node.js / Express / Angular using WhatWeb, confirmed no WAF was present via wafw00f, and noted that full nmap -sV port scanning was limited by Docker’s raw socket restrictions — though it worked around this by falling back to HTTP header analysis.
Report Structure
The final report followed a professional penetration testing format with sections covering engagement scope and methodology, a reconnaissance summary referencing all saved artifacts, a vulnerability overview table, detailed write-ups for each of the 11 findings (including CVSS 3.1 vectors and scores, reproduction steps, and remediation advice), the verified exploits section with embedded PoC commands, an overall risk assessment with a prioritized remediation roadmap, and an appendix listing all tool versions used.
PentAGI also generated a final_validation.txt artifact confirming that all paths in the report resolved correctly, all evidence files were present, and the workspace was cleaned of placeholder scripts — ready for hand-off.
Key Takeaways
Even with a deliberately vague prompt, PentAGI produced a structured, methodical penetration test that followed industry-standard methodology. It autonomously installed tools, ran scans, analyzed results, and pivoted its approach based on what it found — all without any human guidance beyond the initial prompt.
A few things worth noting for anyone looking to try this:
- Prompt specificity matters. A more targeted prompt would produce fewer, more focused tasks. A broad prompt gives you breadth but takes longer and costs more in API calls.
- Docker networking is the first hurdle. Getting your containers to talk to each other is the most likely friction point. Plan your network topology before you start.
- Cost is minimal. At $1.39 for a comprehensive test, the barrier to experimentation is extremely low.
- It’s a learning tool, too. Even if you’re not deeply experienced in penetration testing, reading through PentAGI’s task execution and reasoning gives you a solid understanding of methodology and technique.
- The report is pretty good. PentAGI didn’t just dump raw scan output — it produced a structured penetration test report with CVSS scoring, reproduction steps, remediation advice, and verified PoCs with evidence. For a $1.39 API call, that level of documentation is remarkable.
- Self-validation built in. PentAGI generated its own validation artifact (
final_validation.txt) to confirm finding counts, evidence file presence, and path integrity before considering the engagement complete. It even cleaned up its own placeholder scripts — a level of housekeeping you don’t always see from human testers.